Breathing new life into your bathroom can be as simple as refinishing the vanity. A fresh coat of paint and some minor updates can transform the entire space, giving it a modern and inviting look without breaking the bank.
The benefits of refinishing your bathroom vanity are numerous. Not only is it a cost-effective alternative to a complete replacement, but it also allows you to customize the look to suit your personal style and preferences.
Whether you’re aiming for a bold statement piece or a more subtle, timeless aesthetic, refinishing gives you the freedom to experiment with colors, finishes, and hardware that perfectly complement your bathroom’s decor.
Prepare To Refinish: Gathering Essential Tools And Materials
Before embarking on your refinishing journey, it’s crucial to have the right tools and materials at your disposal. Here’s a comprehensive list to ensure you’re well-equipped for the task.
Read This Blog: WHAT COLOUR GOES WITH BEIGE BATHROOM TILES
Tools:
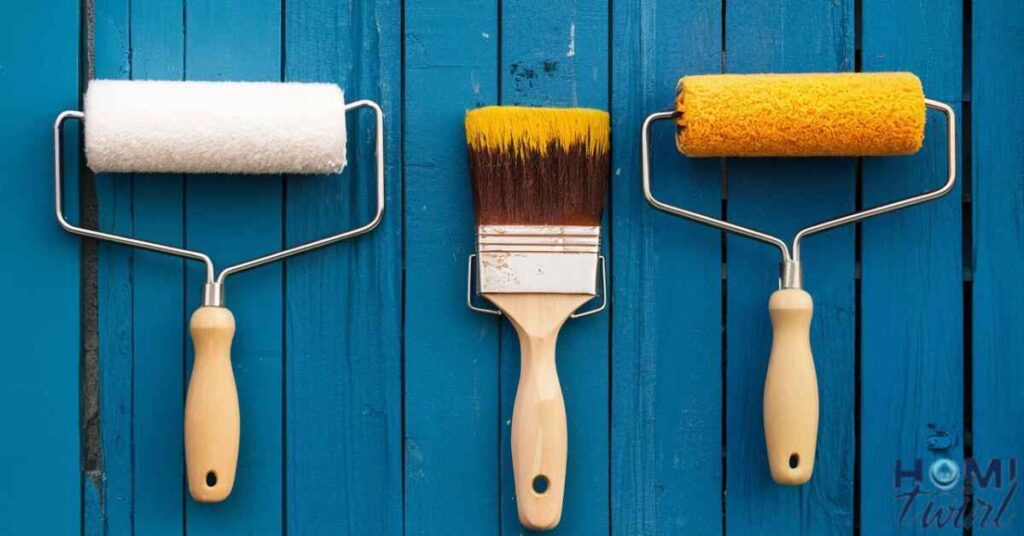
- Natural bristle brushes (for grooves and corners)
- Synthetic bristle brushes (for larger surfaces)
- Paint roller and tray
- Sandpaper (varying grits: 120-220)
- Screwdrivers (for removing hardware)
- Putty knife or paint scraper
- Clean rags or sponges
- Painter’s tape
- Respirator or safety mask
- Work gloves
Materials:
- High-quality, water-resistant paint (latex or oil-based)
- Primer (oil-based or mildew-resistant latex)
- Degreasing cleaner
- Wood filler or putty (for patching imperfections)
- Painter’s plastic or drop cloths
- Labeled bags or containers (for storing hardware)
When it comes to paint and primer, it’s essential to choose products specifically designed for bathroom use. Bathrooms are high-moisture environments, and regular paints may not withstand the humidity and wear and tear.
Opt for water-resistant, semi-gloss or satin finishes that are easier to clean and maintain.
Popular paint brands like Behr and Sherwin-Williams offer excellent options for bathroom vanities, such as Behr’s latex enamel paint or Sherwin-Williams’ Emerald Urethane Trim Enamel.
For primers, oil-based or mildew-resistant latex primers are highly recommended, as they provide superior moisture resistance.
With the right tools and materials in hand, you’re ready to embark on your bathroom vanity refinishing adventure!
H2: How We Refinished The Bathroom Cabinet
Now that you’ve gathered all the necessary supplies, it’s time to roll up your sleeves and get to work!
Step 1: Clear and Disassemble the Vanity

The first step in refinishing your bathroom vanity is to clear and disassemble it. Start by emptying all the drawers and cabinets, removing any personal items or toiletries. Next, carefully remove the hardware, such as knobs, pulls, and hinges, using the appropriate screwdrivers. Pro tip: Label and store these pieces in separate bags or containers to avoid any confusion during reassembly.
Once the vanity is empty, remove the drawers and doors, labeling them as well to ensure they go back in the correct spots. If you plan to paint the cabinet interiors, leave them intact. Otherwise, consider taping off the insides to protect them from paint.
Also Read This Blog: HOW TO PAINT THERMOFOIL CABINETS
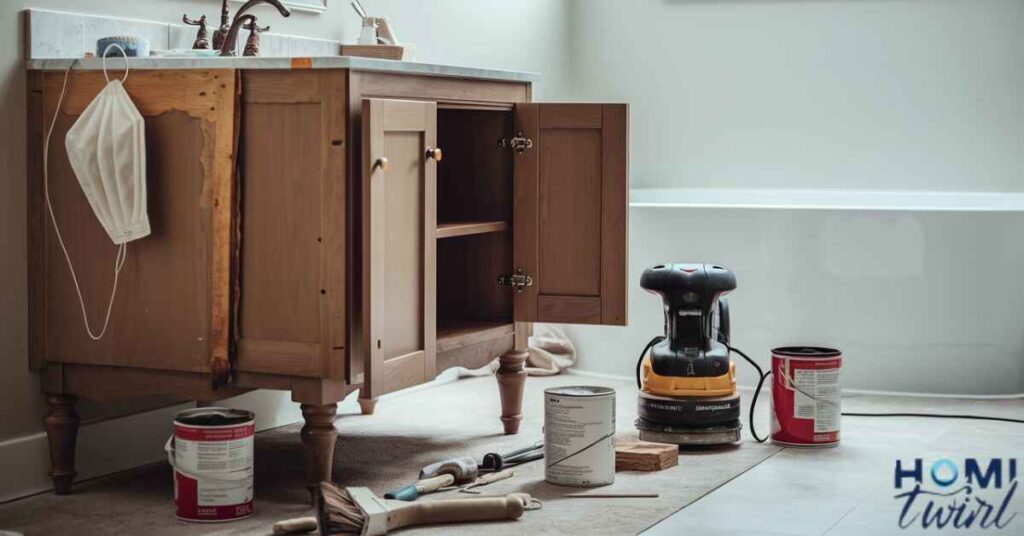
Step 2: Sanding and Patching for a Smooth Finish
Proper surface preparation is crucial for achieving a smooth, long-lasting finish. Start by lightly sanding the entire vanity surface using 120-grit sandpaper. This will help remove any existing paint or varnish and create a rough surface for better paint adhesion.
If you encounter any dents, scratches, or imperfections, now is the time to patch them using a wood filler or putty. Apply the filler as needed, let it dry completely, and sand it flush with the surrounding surface.
Once you’ve addressed all imperfections, give the vanity a final sanding with 220-grit sandpaper to ensure a completely smooth surface. Don’t forget to sand the doors and drawers as well.
Step 3: Priming the Vanity for Long-Lasting Results
Priming is an essential step that shouldn’t be skipped. A high-quality primer not only ensures better paint adhesion but also helps prevent moisture damage and mildew growth, which are common concerns in bathrooms.
For bathroom vanities, an oil-based or mildew-resistant latex primer is recommended. These primers are specially formulated to withstand the high humidity levels in bathrooms and provide a solid base for your topcoat.
Apply the primer evenly, using a natural bristle brush for corners and grooves, and a roller for larger surfaces. Follow the manufacturer’s instructions regarding drying times and the number of coats required. Once the primer is completely dry, you’re ready to move on to the fun part – painting.
Wet Paint Brush Storage Ideas: DIY Roller & Paint Brush Covers For Frugal Painters
Refinishing a vanity can be a multi-day process, and keeping your brushes and rollers fresh between painting sessions is essential. Instead of constantly purchasing new applicators, try these creative and budget-friendly solutions for storing wet brushes and rollers.
- Plastic Wrap Covers: Wrap your brushes and rollers tightly in plastic wrap or aluminum foil to seal in moisture and prevent drying.
- Airtight Containers: Place your wet brushes and rollers in airtight containers or zipper bags, squeezing out as much air as possible to prevent drying.
- Brush Keeper: Invest in a reusable “brush keeper” – a container designed specifically for storing wet brushes and rollers between uses.
By properly storing your applicators, you’ll not only save money but also reduce waste and ensure consistent, high-quality results throughout your refinishing project.
How To Repair A Wood Door That Sticks
If you encounter a sticking wood door during the refinishing process, don’t fret! Here are some helpful tips to get it back in working order.
- Identify the Cause: Check for swelling due to moisture or humidity, or any obstructions like paint buildup or misaligned hinges.
- Sand and Plane: Lightly sand the edges of the door and plane any areas that are catching or rubbing against the frame.
- Adjust Hinges: If the hinges are misaligned, gently tap them back into place or consider replacing them if necessary.
- Apply Lubricant: Use a silicone-based lubricant or wax on the areas where the door meets the frame for smoother operation.
By addressing any sticking issues early on, you’ll ensure that your refinished vanity doors open and close smoothly, adding to the overall polished look of your bathroom.
The Perfect Finish Starts With You
Most Popular Colors for Bathroom Vanities

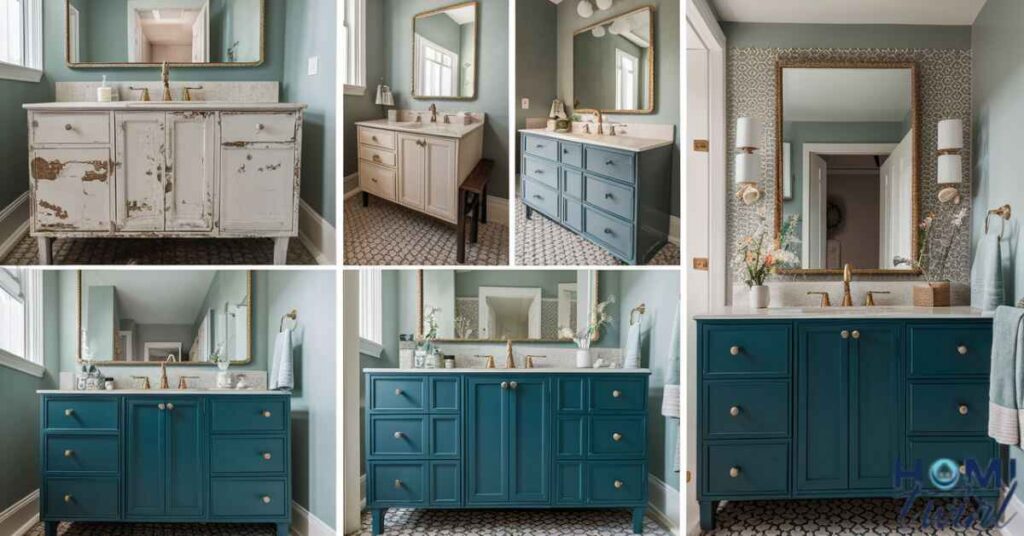
One of the most exciting aspects of refinishing a bathroom vanity is choosing the perfect color to complement your space. While classic shades like white, off-whites, and grays have long been popular choices, don’t be afraid to embrace bolder hues or follow the latest trends. Here are some current favorites.
- Sage Green: A soothing, nature-inspired shade that adds a touch of tranquility to your bathroom.
- Pale Blush: A soft, romantic hue that creates a warm and inviting atmosphere.
- Deep Navy: A rich, dramatic color that exudes sophistication and depth.
- Charcoal Gray: A versatile neutral that pairs well with various accent colors and finishes.
When selecting a color, consider the overall design aesthetic of your bathroom, as well as the existing wall and floor colors. Don’t be afraid to experiment with color samples or use online visualization tools to ensure the perfect match.
Step 4: Applying the Paint Like a Pro
With your vanity prepped and primed, it’s time to apply the topcoat. Here are some tips for achieving a professional-looking finish.
- Proper Technique: Use long, even strokes in the direction of the wood grain, overlapping each stroke slightly to ensure complete coverage.
- Brush and Roller Use: Apply paint with a natural bristle brush in corners, grooves, and tight spaces, then use a roller for larger surfaces.
- Number of Coats: Most paints will require at least two coats for full coverage and a smooth, even finish. Apply thin, even coats, allowing the recommended drying time between each coat.
- Drying Time: Follow the manufacturer’s instructions for drying times between coats and before reassembling the vanity. Proper drying is crucial to ensure a long-lasting, durable finish.
- Paint Order: Start with the doors and drawers, then move on to the cabinet frame and exterior. This way, if any drips or spills occur, they won’t ruin your freshly painted surfaces.
Remember, patience and attention to detail are key when painting. Take your time, and don’t rush the process – the results will be worth the effort.
Step 5: Reassembling the Vanity with Care
Once the final coat of paint has fully dried (typically 24-48 hours), it’s time to reassemble your beautifully refinished vanity. Here are some tips to ensure a smooth process.
- Hardware Replacement: Consider replacing old, outdated hardware with new knobs, pulls, or hinges for a fresh, cohesive look.
- Careful Installation: When reinstalling doors and drawers, do so gently to prevent scratching or chipping the new paint.
- Alignment Adjustments: If doors or drawers are sticking or misaligned, make any necessary adjustments to the hinges or drawer slides.
- Final Touches: Once everything is reassembled, give the vanity a final wipe-down with a clean, dry cloth to remove any dust or debris.
With your refinished vanity in place, stand back and admire your handiwork – your bathroom has been transformed.
Some Tips on How to Easily Redo a Bathroom
While refinishing the vanity is a significant update, there are several other ways to give your bathroom a complete makeover.
- Replace Countertops: Consider switching out old, dated countertops with a sleek, modern material like quartz, granite, or solid surface.
- Update Hardware: In addition to the vanity hardware, replace outdated towel bars, toilet paper holders, and light fixtures for a cohesive, contemporary look.
- Add Accessories: Incorporate stylish accessories like new rugs, towels, and decor pieces to tie the entire space together.
- Repaint Walls: A fresh coat of paint on the walls can dramatically change the feel of your bathroom, especially when paired with your refinished vanity.
By combining your refinished vanity with these additional updates, you’ll create a truly stunning and revitalized bathroom that you’ll love spending time in.
Frequently Asked Question
What type of paint should I use for my bathroom vanity?
Opt for latex or water-based paints with a satin or semi-gloss finish for durability against moisture. Brands like Behr latex enamel or Sherwin Williams Emerald Urethane Trim Enamel are recommended.
How long does it take to paint a bathroom vanity?
Depending on drying times, expect the project to take 2 to 3 days, including preparation, painting, and drying.
Do I need to sand my bathroom vanity before painting?
Yes, gently sanding with 120-220 grade sandpaper ensures better paint adhesion and a smoother finish.
Can I paint over my existing vanity color?
Yes, but thorough cleaning and a primer coat are essential for proper adhesion and a professional finish.
How do I avoid paint drips when painting my vanity?
Apply thinner coats of paint using long, smooth strokes in the direction of the wood grain to prevent drips.
Can I replace the hardware on my vanity?
Absolutely, swapping out old hardware for new ones can give your vanity a fresh look without a full renovation.
Conclusion
Refinishing a bathroom vanity is a rewarding DIY project that can breathe new life into your space. By following these step-by-step instructions, gathering the right tools and materials, and exercising patience and attention to detail, you’ll achieve a professional-looking finish that transforms your bathroom from drab to fab.
Remember, the key to success lies in proper preparation, high-quality products, and a willingness to take your time. And if you ever feel overwhelmed or unsure, don’t hesitate to consult with professional painters or contractors for guidance.
So, what are you waiting for? Gather your supplies, roll up your sleeves, and get ready to revitalize your bathroom with a stunning, refinished vanity that reflects your personal style and elevates the entire space.